Saturday, December 31, 2011

This amazing Geo2011 has come to an end. Welcoming Geo2012!

It has been a while I didn't write here, but we have been very busy in bringing it on with our community projects.

Thanks to Lisasoft and the restless Jody Garnett uDig got a whole pile of new features and will be growing nicely over the next year.


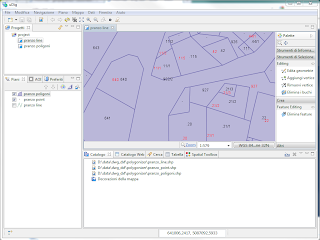
Thanks to us, we now finally have a stable Spatial Toolbox in uDig, which for now bases on the JGrasstools project, but is extensible through the OMS3 model linking technology.


Also the cooperation we had with the Colorado State University and the USDA on OMS3 has been amazing and could be summarized in this presentation.

Also on the mobile side a lot has been going on. In the last months Geopaparazzi could welcome a new contributor, Luca Delucchi, which is an active member of the Openstreetmap community. Sharing a train travel together when returning from the Italian GFOSS conference, it happened that we lost the train and started to talk about how we could make geopaparazzi a better tool for OSM members. Well, we didn't just talk and sure thing one of the most important features that will get out with geopaparazzi 2.6 (we are testing those right now) is the support for OSM points.

The map view now presents an OSM logo handle on the right side, and when opened it shows the supported OSM categories:


By selecting a category you gain access to the supported tags:


The tags description generates the form:


Once the form is saved the OSM point is in the database.

The OSM points can then be synchronized with the online OSM account of the user. I really have been waiting for that a long while :)

Another small addition is the enhancement of the profile view for gps logs, which now supports real charting and zooming as well as zoom to selection:


A more complete story about geopaparazzi can be found here.

It has been also a great year for our enigneering company, which lead as side product from a cooperation with the university of Trento to the release of the Nettools. I recently gave a presentation about how we use the nettools, so I will leave it to this post and that presentation.

That has more or less been my Geo2011. A great year. I wish you all an even more amazing geo2012. See you around the world, being it in Trieste, Prague or Beijing.


Saturday, November 19, 2011

Geopaparazzi 2.5.0 is out

We just released Geopaparazzi 2.5.0 to the market.

The main changes are around images, which now are referenced in the database. That lead also to have a layer showing them in the map.


One thing long wanted was the insertion of the GPS tags in the pictures. So Exif tags are now supported, based on position, elevation (for whatever that means) and azimuth:


The notes workflow has been unified: both from the main and map view a notes view opens with both simple image/text notes and form based notes. Next week at the Italian Osgeo chapter meeting we will talk about how to evolve the form part.


Enjoy!

Sunday, November 6, 2011

android manifest permissions filter in the market

I had a hard time making Geopaparazzi appear in the market for my Asus Transformer. I first thought it was a screen size/density problem, but then I had any permission

<supports-screens 
        android:smallScreens="true"
        android:normalScreens="true" 
        android:largeScreens="true"
        android:anyDensity="true" 
        android:resizeable="true">
</supports-screens>

so I tried to play on sdk versions, btu had the same results:

<uses-sdk 
         android:targetSdkVersion="14" 
         android:minSdkVersion="5">
</uses-sdk>

and I read a dozend times through the docs and finally noted the necessary part:

In general, if an application requests hardware-related permissions, Android Market assumes that the application requires the underlying hardware features, even though there might be no corresponding to declarations. Android Market then sets up filtering based on the features implied by the declarations.

Well, as obvious as it sounds, my Asus has no telephony soppurt, and therefore it was not listed because that permission was asked.

Android 2.0 (API 5) brings the possibility to declare optional features:

<uses-feature 
       android:name="android.hardware.telephony"
       android:required="false">
</uses-feature>

That does the trick.

I hope that saves some headache to someone else.

Saturday, November 5, 2011

Geopaparazzi 2.4, pouring the beer!

There has been lots going on about geopaparazzi in the last year.

Customizations have been in the fields of disaster management and waste management, find a short description here.


There has been talk about integration with the ODK project.

With the new android based tablets there has been talk to get more features from BeeGIS into Geopaparazzi to bring the field survey on those new, lightweight, nice cozy, smart devices.


Our (HydroloGIS) objective has been to release the project as free in the market (it has been free and open source from the very start) once we had the money in we needed to buy the book to learn android development. Well, we got more, we got to develop customizations and it is about time that we finally release it free in the market.

So it is official, Geopaparazzi is now not only free as in speach, but also as in beer!

We would like to express our gratitude to all those that supported us through the buying of the application!

We also hope this will attract developers to contribute to the project.

Cheers!

Friday, November 4, 2011

HyUml apps for yUML

Woa... it has been a busy time and my posting force has really dropped. There are a lot of news in the jgrasstools, uDig and open source world to tell about, but for now I will just announce this (I do not need my brain to write about certain things).

I recently got in need to be able to do some design on the road on an android tablet. So I started to search in the market and found some apps. They all were posing as gui to the really nice yUML project.
I found that an amazing idea, but the available tools didn't have certain features I felt were necessary:

* to have an editor and uml view aside of each other
* be able to easily load and save files and dump the image to disk
* be on both android and desktop

That is why I started HyUml:


It is already very usable and it is coded in really few time and with no resources, but it serves the purpose and I am having a good time with it. It is obviously open sourced, so maybe you can also make use of it.

Some snaps:

RCP Version:


Well, maybe I should add that in the lower left panel you get the html img tag text that you can put inside a wiki to have the diagram generated there. This is nifty :)


Android version:


While the android version is in the market, the rcp version has to be built as an eclipse application. For thos interested in the source code of the two projects, they are both on bitbucket on the hyuml repository.

Enjoy..

Monday, October 3, 2011

Monday, September 5, 2011

Migg and Nettools courses planned

For all those interested in taking class about hydrology, geomorphology, water supply systems and stormwaters, all done with Free and Open Source tools, the following could be of help.

The C.U.D.A.M. of the University of Trento, has defined the dates of the next courses:

MIGG: Hydro-geomorphologic analysis integrated in GIS
25-28 October 2011

A new course is available from this year, which deals with water supply systems and is scheduled as follows:
Planning and maintainance of hydraulic networks
7-10 February 2012

All the courses use the Free and Open Source softwares uDig and JGrass.

More info at the official website of the courses: http://events.unitn.it/migg2011-12

The only downside... the courses are kept in Italian.

Friday, August 12, 2011

Small enhancement in single band raster styling


We already had tools to style single banded raster, i.e. color ramps on elevation models and similar things.
What was missing was a nice handling of novalues and other values we would not care. Take for example the following map:


This is how an ascii grid is loaded into udig...

Well, we can ask to read the values to propose a colortable through "reset colormap". But that would consider -9999 novalues. Therefore we added the possibility to define other novalues to ignore in the process. Applying that colortable will produce:


Where is the problem? The 0. The map was probably transformed and the altered collar part has been set to 0. We can try to add to the novalues list also the 0 and reset once more:


That is about it, nice, so we now apply one of the predefined colortables, to better look like a DTM:


Well, to really get rid of the 0 novalues, we need to create rules to "hide" those part, else they will not appear transparent and overlay on other layers.
We now added a button that will take the manually defined novalues and create transparent rules for them:


That is what we wanted to have. Just remember to export the style to have the same name as your raster map and the extension .sld, and you are good to go.

Also note that now we have select all/none and invert selection for rules, which get very handy when you need to move rules up and down.


Saturday, July 9, 2011

eRCP, windows mobile 6, phoneMe, J9 fruit salad

I was asked to investigate a geopaparazzi port on Trimble Juno SC. Well, obviously it is not Android. But not only that, it is also not open source at all. In fact it is one of the closest source situations I have been in many years. Anyways, while investigating all the .Net and C# and gps apis, I also gave a look at a project I fell in love with long time ago, but never really had the possibility to try: eRCP.

To be honest the project looked quite dead and it took me a really long time to figure out the current way to do things best.

The best thing right now is to download the Pulsar eclipse IDE project
and install the ERCP SDK through the update site, which now is: http://www.eclipse.org/ercp/pulsar. At that point the sdk is installed.

At that point the docs tell to go under preferences->target platform and define a new target platform based on a new eRCP template. That will take the internal sdk and load it as target platform to develop against. Well, later I found out that it didn't work for me.
What worked instead was to download:
- the ercp sdk
- the win32 runtime
- the windows mobile runtime
and add those to the target platform configuration. At that point I was ready to develop.

First thing I wanted to run the demo codes, that can be found in the ercp cvs at dev.eclipse.org.

So simply create a cvs repo with:
host = dev.eclipse.org
repo path = /cvsroot/rt
using anonymous user and browse the HEAD into the org.eclipse.ercp folder to checkout as a project the org.eclipse.ercp.app application. That way you can run the example applications on your windows pc.

Obviously you want to run them on the mobile devide. Ok, that was trickier.

First thing you need to upload top the device (let's say in the root folder) the eRCP folder that can be found inside the windows mobile runtime downloaded before. That one contains also the example runner files.

The few examples found all make use of the J9 IBM environment to run the eRCP demos. Well, that one is not open source and also not free right now. But it seemed the only possible way to go. I tried to use the J9 bundle that gvSig mobile is using but was not successful. Being in need to really know if eRCP is a way to go, I finally decided to buy the J9 environment (I hate to buy things when I don't even know if I will ever need them!). Once bought, I installed it on the Juno and was looking forward to see the examples work.

Well, that also didn't happen. The launcher crashed and I was getting more and more frustrated. But I spent money and now it HAD to work. So I started to search for solutions for the J9 crashes.

That was the moment when the following two blog posts came in my way:
Phoneme advanced and eSWT Running Under x86 Windows
Running eRCP with Phoneme Advanced on your mobile phone

This man, apart of writing amazing posts, made me feel stupid for having bought something I didn't want (I deserve it), but also really solved my issues.

From the phoneme I donwloaded the right cab, uploaded it to the juno and installed it.

I then had to change the launcher links of the examples a bit from:

37#"\Program Files\J9\FOUN10\bin\j9.exe" -jcl:foun10 -cp \eRCP\startup.jar org.eclipse.core.launcher.Main -application org.eclipse.ercp.eworkbench.eWorkbench -console

to:

37#"\Programmi\pMEA FP\bin\cvm.exe" -Djava.specification.name="J2ME Foundation Specification" -cp \eRCP\startup.jar org.eclipse.core.launcher.Main -application org.eclipse.ercp.eworkbench.eWorkbench -consoleLog

And it finally worked!! Being an RCP developer for the uDig project I really love the eRCP approach. Now I just have to understand how to take pictures in windows mobile from eRCP and then I am really happy.

I hope this can help someone else to don't lose maoney and time in trying just to make some demo code run.

Saturday, July 2, 2011

On your marks, get set... spatial toolbox on the line

Doing the last piece of migration JGrass into uDig, i.e. the Spatial Toolbox (aka. OmsBox) has been a lot of pain. One of those things in which the last 2% cost you almost as much as the 98% before.
We have been using the toolbox in testing now almost half a year now and finally today the last bits have been placed in the proper locations:

* the PSC has reviewed and accepted my plugin
* the code is inside the main uDig repository
* the libraries needed have been sorted out
* a new release of jgrasstools has been made to be aligned with the uDig libs (0.7.1)

and...

* the uDig help page that is required by the heavy metal Jody Garnett reviewer (thanks for helping) is also there. It can be found here.

Tomorrow we should be able to tag a snapshot release and on tuesday we should have the release ready for the Osgeo DVD. I think I will soon sleep much better...

Saturday, June 11, 2011

LIDAR data & jgrasstools and uDig

Well, we always like to look at things from different perspectives. And we are really fast when we use our own tools, that we can bend and change to our needs.

We are slowly bringing some las reader we wrote into the jgrasstools family, so that we then can add some analysis support. Sure thing nothing to do with the great laslib project, but it is handy for us to be able to certain tasks without dependencies and most of all be able to chain results into other modules directly.

So a first test takes 22M of points, filter them down to 12M (only first impulse) and splits them over 1M points shapefiles. I tried to write one single shapefile, but the geotools shp writer simply froze :) Will have to investigate further.

One thing uDig is really one of the best at, is to visualize HUGE amount of features. I am always amazed to see how well it does in that. Here 10M points loaded after properly stiling them by quantiles:


Yes, it already look nice for a first test. Zooming in it looks even better:


Yes, yes, shapefiles are maybe not the best format to use in this case, but hey, I really enjoy to play around with them to have a better feeling about what I am dealing with.

Well, this is a starting point. Let's see were it leads to...

Tuesday, May 24, 2011

OMS3 Grass modules Wrapper at Prague GRASS-Hackfest

Last week I took part at the GRASS Community Sprint. As every sprint I took part at, it has been an amazing experience and it has been good to catch up with "old" grass developers I knew and to get introduced to some really great "new" developers.

At the sprint I wanted to wrap all the grass modules in an OMS3/jgrasstools wrapper. Well, I had only two days to code on it, so I am not exactly where I wanted to, but lot's of stuff is already working and I can show you some stuff already loaded in the OmsBox:

Running r.watershed from within uDig:


And the result:


If you want to know what OMS3, jgrasstools and the omsbox are, you are invited to have a look at the presentation I gave at the Geoinformatics FCE CTU 2011.

While in the screenshots you can see the modules inside the OmsBox (just so it looks nice), the result is a very small java package that depends on no big library or toolbox, so that the whole java world can take advantage of this. Amen!


I would also like to thank personally the sponsors that helped out:
GFOSS.it Associazione Italiana per l'Informazione Geografica Libera
Stefan Sylla, sylla-consult, Frankfurt, Germany
R3 GIS, Merano, Italy
FOSSGIS e.V., D-A-CH

Wednesday, May 18, 2011

rst2pdf for presentations: installations and svg usage

Lately I tried out reST after a hint of good man Paolo Corti.

After some startup problems I am now really satified with the results. Amazing over all the possibility to embed svg files instead of images. My diagrams now really rock!

Not being a Python guy I had some problems to install rst2pdf. Well, in linux it is easy like:

sudo apt-get install python-pip python-virtualenv
sudo apt-get install python-matplotlib python-scitools
sudo easy_install rst2pdf
and the dev file if they are not installed already sudo apt-get install python2.7-dev

but in windows I had several problems with error messages. I will have to try again and update here the procedure.

When using svg images, I was getting missleading errors which then got solved by running with the -e inkscape switch.

rst2pdf -s 2011_05_19_Geoinformatics_FCE_CTU.style -e inkscape 2011_05_19_Geoinformatics_FCE_CTU.rst

Yes Martin, the first presentation done with reST is for you :)


-------------------
UPDATE 2011/10/06

The workflow to install rst2pdf on a windows machine was the following:

- install python 2.7.2 (for 32 bits for God's sake!!!)
- follow http://pypi.python.org/pypi/setuptools#windows
- (install mingw???)
- easy_install.exe PIL
- easy_install.exe rst2pdf
- install inkscape


I wasn't able to install matplotlib so that it would work in rst2pdf on windows up to this point.


-------------------
UPADTE 2012/11/12

Just installed rst2pdf again and got this error:

  File "/Library/Frameworks/Python.
framework/Versions/2.7/lib/python2.7/site-packages/rst2pdf-0.92-py2.7.egg/rst2pdf/styles.py", line 527, in __init__
    reportlab.platypus.tables.
CellStyle1.fontname=self['base'].fontName
AttributeError: 'module' object has no attribute 'CellStyle1'

And found the fix ready in the tracker:
 
And indeed it has no such attribute. Changing line 527 to refer to CellStyle.fontname (no numeral 1) fixed the problem.


UPDATE 2011/09/02

Due to a strange docutils-python mismatch, rst2pdf is no longer working for me, because one of the used functions changed signature.

The error I get is:
Traceback (most recent call last):

  File "/usr/local/bin/rst2pdf", line 9, in 

    load_entry_point('rst2pdf==0.16', 'console_scripts', 'rst2pdf')()

  File "/usr/local/lib/python2.7/dist-packages/rst2pdf-0.16-py2.7.egg/rst2pdf/createpdf.py", line 1452, in main

    numbered_links=options.numbered_links,

  File "/usr/local/lib/python2.7/dist-packages/rst2pdf-0.16-py2.7.egg/rst2pdf/createpdf.py", line 169, in __init__

    get_language (self.language)

TypeError: get_language() takes exactly 2 arguments (1 given)


The solutions was given by the author of rst2pdf and consists in opening the file createpdf.py (which in my case is in

/usr/local/lib/python2.7/dist-packages/rst2pdf-0.16-py2.7.egg/rst2pdf/createpdf.py


) and add at line 66 (right below the line

from docutils.transforms import Transform


) the following lines:

import docutils

if docutils.__version__ >= '0.8':

    orig_func = get_language

    def get_language(arg1):

        return orig_func(arg1, None)


Monday, May 16, 2011

The first release of jgrasstools is out


The first official release of JGrasstools has been released as 0.7.0.

We have worked about a year to prepare not only the algorithms contained in this release, but also the supporting the evolution of the OMS3 framework to gain the main objective of the JGrasstools library: the possibility to link together models in a most possible flexible way, being it along a timeline or in standalone mode, being it in complex and recursive way or in simple standalone mode.

JGrasstools represents the effort to extract the processing power of JGrass to library level.

For documentation, downloads, you can read the whole story at the release notes page.

Sunday, May 8, 2011

NetTools 1.0.0 in Osgeo4W flush


We have been working on the nettools for udig a while now. The aim is to have tools to handle water supply systems and stromwater networks.

Well the first part is out. Epanet inside uDig for water supply systems.

It gives the possibility to create networks inside the GIS


And has wizards to run simulations


It has also been used in developing countries already, for planning and training purposes


Guess what is missing as usual? The manual... I really hope someone gets that one done. Downside is that for now the tools have to be used by trying them and asking for help in the udig mailinglist.

For now the nettools are available in the Osgeo4W installer.

Wednesday, April 27, 2011

Open the properties view

Why do I always forget? Need to nail it down.

PlatformUI.getWorkbench().getActiveWorkbenchWindow().getActivePage().showView("org.eclipse.ui.views.PropertySheet");

Tuesday, March 29, 2011

osgeo4w for impaired networks

There has been some discussion going on about the osgeo download server (http://download.osgeo.org) being not reachable from certain networks (for example Italy's main provider Telecom, but also providers from other countries). This also means that the osgeo4w installer is not working right now, even if there is a mirror server (http://download2.osgeo.org) available that would be reachable from those networks (at least the Italian one).

Thanks to Matt Wilkie, there is now a tested (not as my recent desperate failures) way to get to update the osgeo4w packages. It is a bit less userfriendly, since commandline based, but I am sure many will appreciate. I did. Thanks Matt, also for the following instructions!

First some definitions:

%OSGEO4W_ROOT% refers to the installation folder of osgeo4w. In my case the folder is C:\OSGeo4W, which is the default.

Instructions:

1) download the file: apt.py
and save it to %OSGEO4W_ROOT%\bin\apt.py. If the file already exist, you can skip this step.

2) Create in the same folder as 1) a file named apt.bat, which contains the following line:
@python "%OSGEO4W_ROOT%\bin\apt.py" %*

3) Open the Osgeo4w command shell (it can be found in the program menu under osgeo4w) and inside that run the commands:

3.1) To update the list of packages:
apt --mirror=http://download2.osgeo.org/osgeo4w update

3.2) To get the list of available packages:
apt --mirror=http://download2.osgeo.org/osgeo4w available

3.3) To install a package:
apt --mirror=http://download2.osgeo.org/osgeo4w packagename


Full command options: http://trac.osgeo.org/osgeo4w/wiki/pkg-apt


I really hope that can help someone to get its preferred osgeo4w application until the eembargo is over.


PS: the --mirror instruction is necessary only in the first command run

-----------------------------

TROUBLESHOOTING

There might be a couple of problems:
1) python is not installed in your osgeo4w installation (WHAT, NO PYTHON!!!!!???? Where do you live!?!?!? In a java world!??!?! :) ). In that case you will have to install it and then change the apt.bat to refer to your python installation.
In my case I had a python installation on my pc, but non in the osgeo4w installation, so I changed the apt.bat file to be:
C:\Python27\python "%OSGEO4W_ROOT%\bin\apt.py" %*
After that everything worked flawless.

Another option is the http://code.google.com/p/maphew/wiki/OsgeoFromScratch documentation.


2) If the apt update didn't work, try first to run:
apt --mirror=http://download2.osgeo.org/osgeo4w setup

I can't remember if I ran it or not and now it is too late to tell if that did unlock anythig in the begin.

Thursday, March 24, 2011

geopaparazzi 2.3.0 out - the osmdroid integration

Today we released geopaparazzi 2.3.0 to the android market.

This release bring a ton of news and fixes. The two most important are for sure the fixing of some GPS issues, making the gps now faster and more stable. The other is the integration of the osmdroid project as the mapping engine for geopaparazzi. Since the mapping engine needed to get professional finally, we decided to do it properly, and the osmdroid project does that.

Another nifty addition is the support for bookmarks.


Full release notes:

New features:

* integration of the osmdroid project (brings multitouch, minimap, scalebar, enhanced rendering, multiple tile sources...)
* enhanced tools in slider over map
* support for bookmarks

Enhancements:

* enhanced handling of gps status icon
* updated documentation at: www.geopaparazzi.eu
* icons now are properly created for various densities
* possibility to delete notes and bookmarks on the visible map
* better contrast color for chart viewer
* labels properties for better overlay of poi layers
* select/unselect all on data lists

Fixes:

* fix for logs not showing up on map at logging start
* new project was landing in backed up folder
* proper distance calculation in 3d
* gpx support also for gpx 1.0, not ony 1.1

Thursday, March 17, 2011

android and the density of icons with inkscape

When android started to support multiple screen densities, geopaparazzi started to have some problems with blur icons on different devices. I was delaying the creation of the icons at the density for gigh/medium/low density devices... because I didn't know exactly how to do them :)

Well, recently I started the the new toolbox slider for geopaparazzi


and those were looking really ugly at the wrong densities, so I had to face that density thing.

This is how I did it with inkscape, after studying some icons done with the amazing asset studio. As I realized for menu icons for example, they generate for the different densities (assume squares):

hdpi: 72 pixels at 72 dpi
mdpi: 48 pixels at 72 dpi
ldpi: 36 pixels at 72 dpi

With that info my workflow was the following for an icon that I needed to be of size in android = 32 dip:

1) define the sizes I need, assuming that the 32 dip are well fitting with the mdpi mode:
hdpi: 48 pixels at 72 dpi
mdpi: 32 pixels at 72 dpi
ldpi: 24 pixels at 72 dpi

2) inside of inkscape, were I created all the icons, I resize my images to be 48, 32, 24 pt. Please note it is pt, non px.


3) export the images as icons for the different sets in hdpi, mdpi and ldpi in the android app.

an believe it or not, now I have very clear and smooth icons in my application.


--------------------
Update 1:
For an Olitab using 320x320pt at 72 dpi looks good


Friday, March 11, 2011

uDig-dev, uDig's evil brother

Since atm lot's of development is going on in the uDig world, I decided to create a uDig-dev package for osgeo4w:


This one will not be a stable version, but will contain all cutting edge new features.

One example? The georeferencing tool:


But read about it on Jody's post. Oh man, these are fun times :)

Wednesday, March 9, 2011

Mercurial and Git cheatsheet

We are using Git and Mercurial for many different projects. Apart of suffering often of confusion in command usage, I am still trying to figure out tricks and understand advanced features. here I will try to keep a cheatsheet uptodate. Corrections are welcome, as well as comments about how to fill in the gaps. Whatever comes in and makes sense, I will update the cheatsheet.

In this I am not trying to show how that git and hg are the same. I only want to show how common tasks could be done in the two versioning systems. Please be aware that (as some commented) this might create confusion, since there is no 100% same way to do things and branches, tags and whatever do not always have the same meaning in both worlds. So please be careful. I find the cheatsheet useful, so might others

Discussion ongoing in the comments section.


--- update 1: Wed Mar 9 11:22:54 CET 2011

Monday, March 7, 2011

Perhaps not everyone knows that... line tools in uDig

While adding some small tools to handle orientation and moving of features, I noticed that I didn't even remember that I had added the possibility to show a profile of a feature over a coverage (!!).

So I though that if I don't know it perhaps many others might not know.

So here some it is, select a feature and a coverage layer, and it will appear as operation:


If you have to handle lots of data and need to analyse them and move them around, the following tools might also be of use:


View line orientation:


Invert orientation of any 2d geometry:


And moving features one layer up or down:


To help in being really fast, here the shortcuts:

- move features a layer up: Alt-Shift-W
- move features a layer down: Alt-Shift-Z
- view line orientation: Alt-Shift-A
- invert geometry orientation: Alt-Shift-S

Saturday, March 5, 2011

BeeGIS in osgeo4w

As promised we now have also BeeGIS coming with the osgeo for windows installer.

Again, want to try it out? Just run the installer here and search for BeeGIS in the advanced install. The BeeGIS extentions will appear in the uDig istallation.

Friday, March 4, 2011

uDig in osgeo4w again with 1.2.1

After some nice user making me notice that I was laging 3 years behind with the uDig version in the osgeo for windows installer, I wrapped myself up and with the gentle help of the osgeo guys (I had 2 tickets open since 3 years :( ) I got back on track.

The result is that uDig 1.2.1 is available in the osgeo4w installer. I really like the installer of osgeo4w and I will definitely put also BeeGIS as an installation option into it.

Want to try it out? Just run the installer here.

Monday, February 21, 2011

Geotools SWT/JFace module and its RCP integration

After some discussion in the geotools mailinglist about the possibility of a SWT port of the geotools swing module, Ian Mayo from the Debrief project funded the port. He also wanted the resulting port and documentation to be Open Sourced (thanks!).

The result looks like:


A tutorial adn the source code about how to get there are here.

Wednesday, February 16, 2011

Copy Maven Dependency Tree jars

Well, it is the second time I need to get the jar on which a maven project depends on and copy them into a non-maven application. Sure mvn dependency:tree is your friend to see which jars you need to copy. And there are also maven tasks that can do the copy. But what if I want to copy them over without polluting the pom? I couldn't find a quick way (I am sure someone will tell me :)), so I created a groovy script that would do that for me.

Here it is, change the path to the repo, change the path into which to copy to, and run the thing.


// copy also source jars?
def alsoSources = false;
// copy also javadoc jars?
def alsojavaDocs = false;
// your maven repo path
def repo = "/home/moovida/.m2/repository/"
// path to which to copy them
def copyPath = "/home/moovida/development/gt-swt-port-hg/rcp-gt-swt/libs/"


def mvnCommand = "mvn dependency:tree";
def proc = mvnCommand.execute();
proc.waitFor();

def output = proc.in.text;
// clean out what we need
def lista=[];
def lines = output.split("\n");
def depsList = [];
def startIndex = -1;
def endIndex = -1;
for (int i = 0; i < lines.size(); i++){
def line = lines[i];
if(line.startsWith("[INFO] [dependency:tree]")){
startIndex = i + 1;
continue;
}
if(startIndex != -1 && line.startsWith("[INFO] ----------")){
endIndex = i - 1
break;
}
if(startIndex == -1){
continue;
}

lista << line;
}

println "Search for:"
lista.each{
println it
}

println "---------------------------------------"

// find jars
def basedir = new File(repo)
def files = [];
basedir.eachDirRecurse () { dir ->
dir.eachFileMatch(~/.*.jar/) { file ->
files << file
}
}

// extract name pattern and version
def fileBeginList = []
def versionList = []
lista.each{
def split = it.split(":");
fileBeginList << split[1]
versionList << split[3]
println "${split[1]} --- ${split[3]}"
}

def finalList = [];
// extract right jars paths from list
for (it in files){
def name = it.getName()
def path = it.getAbsolutePath()

if(!alsoSources && name.matches(".*sources.*")){
continue;
}
if(!alsojavaDocs && name.matches(".*javadoc.*")){
continue;
}

for (int i = 0; i < fileBeginList.size(); i++){
def fBegin = fileBeginList.get(i);
def version = versionList.get(i);
if(name.startsWith(fBegin)){
if(name.matches(".*"+version+".*")){
finalList << it;
break;
}
}
}
}

println "---------------------------------------"
println "Found:"
finalList.each{
println it
}


println "---------------------------------------"
if(copyPath){
println "Copy deps jars to: ${copyPath}"
finalList.each{
def name = it.getName();
def path = it.getAbsolutePath();
def newPath = new File(copyPath, name).getAbsolutePath();
new AntBuilder().copy ( file : path , tofile : newPath )
}
}


Worked well for me.

Thursday, February 3, 2011

uDig 1.2.1 is out

Copied over from the official uDig blog:

We have recently released uDig 1.2.1. This is an incremental update with mainly bug fixes but there are a few notable features added as well.

  • Additional style editor pages; thanks to the JGrass project and Hydrologis
  • Access to the latest GeoTools renderer with support for hatch patterns
  • Access to world+image "bmp" files
  • Experimental - WMS 1.3.0 support
  • Updated "submit log" in the help menu
Additional documentation:

  • Updated online help capturing the new style pages style pages
  • Updated intro documentation for users and developers

For developers:

  • We have migrated to a new git repository http://gitorious.org/udig
  • Access to the latest GeoTools 2.7 Release Candidate

The new release can be accessed and downloaded from http://udig.refractions.net/download/


Monday, January 31, 2011

My latex friend Texclipse

I think I tried it once already and it wasn't mature at that time, but now I am really glad to say that the project is really nice and usable: Texlipse.

Finally a way to write my latex documentation from within my favourite IDE. While under linux setting up latex is quite easy, in windows it needs a bit more love.

Antways the configuration instructions on the texlipse site are great, so not much more to say.

The only thing I found nasty, is the fact that I need the output pdf to be built in a different folder than my source files are in. For me this is due to the fact that otherwise every time I save and it builds, the pdf is uploaded on my dropbox.


As you can see in the screen, there is a setting that tells: "bin directory of tex distribution", which should give me the possibility to change the output folder. Well, in my install, that one is not only ignored, the textfield of the folder gets blanked out after I press APPLY or OK.

An easy workaround is to add the small option to the command -output-directory=:


Good stuff from the Texlipse guys, goooood stuff!


Oh yeah, and wait, a screenshot:

Monday, January 24, 2011

Geopaparazzi 2.1 released


Geopaparazzi 2.1.0 has been released to the android market.

Release notes for version 2.1.0

New features:

  • zoom bar on map view to choose the zoomlevel

  • compass view now links to the Gps Status Application


Fixes:

  • lots of enhancements on the data decimating and rendering performance, fixing crashes and freezes

  • .nomedia file in the maps cache folder to stop scanner from browsing it


As usual the updated docs are here.

Wednesday, January 19, 2011

The last two steps of JGrass towards uDig

It is since the joining of the uDig community that we wanted to slowly migrate all of JGrass as smooth as possible into uDig. This process has been slow and effort consuming, but is now at a good point, as some of the previous posts here document.

I will now the most important proposal to the uDig community, hoping that it will be accepted. If you are interested in reading through the thing, just go for it.


Need a candy? Here you are:

Tuesday, January 18, 2011

JGrass all-in-one bundle

We got requests from users to put the an all-in-one bundle of JGrass/BeeGIS downloadable on the net.

In 2010 we used one version for several courses. It is the one some of you know because it had working support for netcdfs in uDig.

Well, while waiting for the next version of uDig with much of JGrass integrated directly and while waiting for a complete merge of JGrass into uDig, we put the bundles at this page.

There are several presentations on slideshare of the courses that can be used both to get started with JGrass and also to do advanced hydrology with JGrass. Some of them can be found here, which is also the place were stuff will slowly appear as it is produced.

Enjoy.